Matrix Lighting's Viribright Benchmark 8W LED
Impression
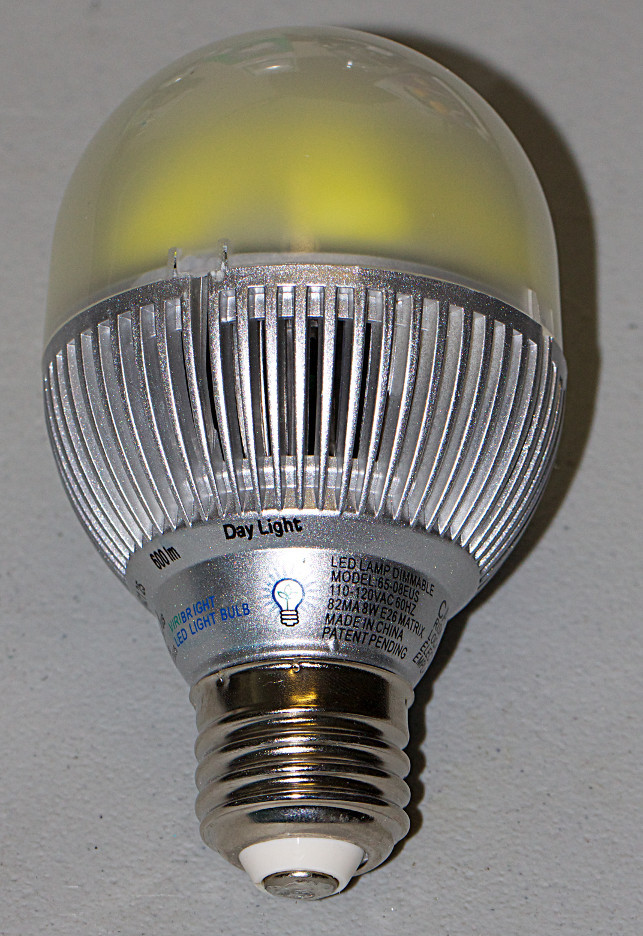
This a fairly inexpensive LED bulb made in Hong Kong by Matrix Lighting. Its external build quality appears decent, especially given that it costs about $10-$14 on eBay. It's available in warm white (the hideous color of incandescent lamps which many people prefer over daylight, to my annoyance), cool white (the less hideous color of common fluorescent lamps), and daylight (an approximation of the one true color temperature). I got the daylight version and installed them in my kitchen light, replacing CFLs there - I tend to cycle the kitchen light quite a bit and it's just not an optimal setting for CFLs. I also planned to put one in the bathroom light, but the Viribright 8W bulb wouldn't fit in the fixture - they describe it as a "globe" and it's sort of true, but the angle at which it emits light is really too narrow for, say, a vanity mirror.
I haven't done measurements to confirm this, but the box claims 75 lumens per watt, less than the 94 lumens per watt claimed by some of Philips' LED bulbs, but still better than most CFLs. Like most LED bulbs, it is said to work with leading edge dimmers, but I didn't test its dimming characteristics.

Low frequency RF emissions from the bulb (top) compared with ambient noise.
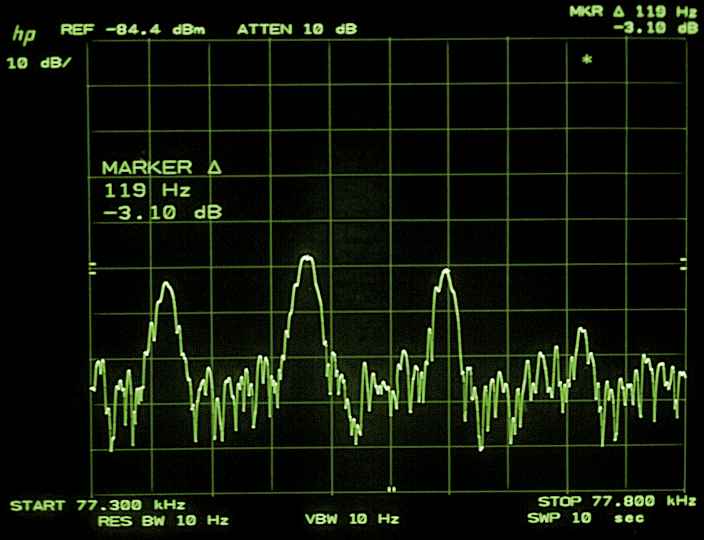
Power supply noise detail, showing that it is modulated by 120 Hz.
It isn't quite as bright as one might want, but it seems that at this stage, LEDs rarely are, at least for room-lighting purposes. It also makes a low frequency buzzing noise that goes away after it warms up for about fifteen minutes. The color rendering is subjectively poor and it has a slight bluish cast - it's better than the dismal orange of an ordinary incandescent as far as color, but it's decidedly inferior to CFLs of similar price. The outside remains fairly cool, less than 40C in free air vertical mount, but inside it gets hot - the temperature inside the diffuser was 50C after less than an hour of operation, with IR thermometer survey of the interior of a freshly deenergized bulb showing some areas up to 70C.
The radio interference situation is not bad. (Pardon the screen photos, my HP-IB converter is offline at the moment.) Spectra are shown around what is apparently the power supply switching frequency of about 78 kHz, most of the noise is that and its harmonics and modulation products (it drifts quite a bit, unsurprisingly.) There is also some emissions around 140-170 MHz and also 420-460 MHz, but these are really subtle. Don't put it under your 2m or 70 cm band ham radio antenna, I guess. As I mentioned before, there is a fair amount of acoustic noise to contend with when it's warming up; not noticeable in a light fixture on the ceiling but it might make a bad choice for a reading lamp. There is no detectable optical modulation; like all modern CFLs and LED bulbs, it's flicker-free.
Teardown
By lightbulb standards, the Viribright Benchmark is fairly easy to disassemble without damaging it. Mind you, many CFLs can only really be disassembled with a hacksaw so that is not saying much.
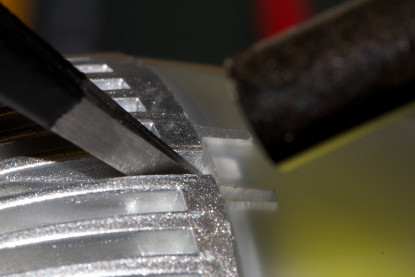
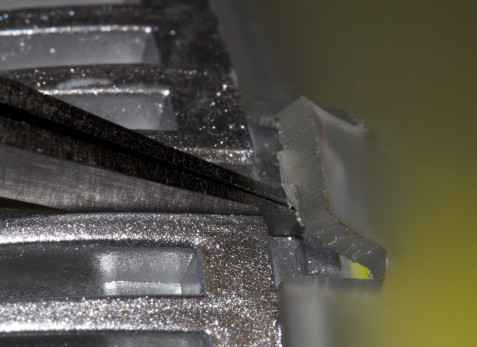
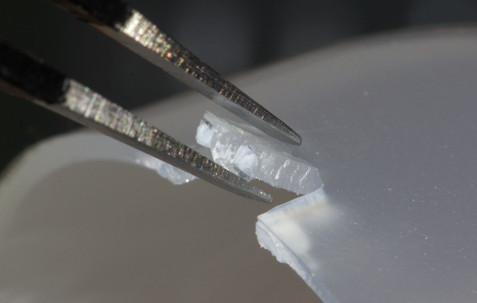
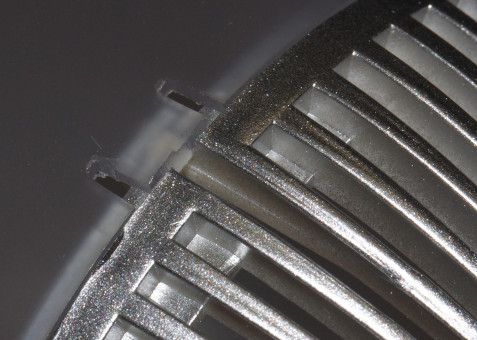
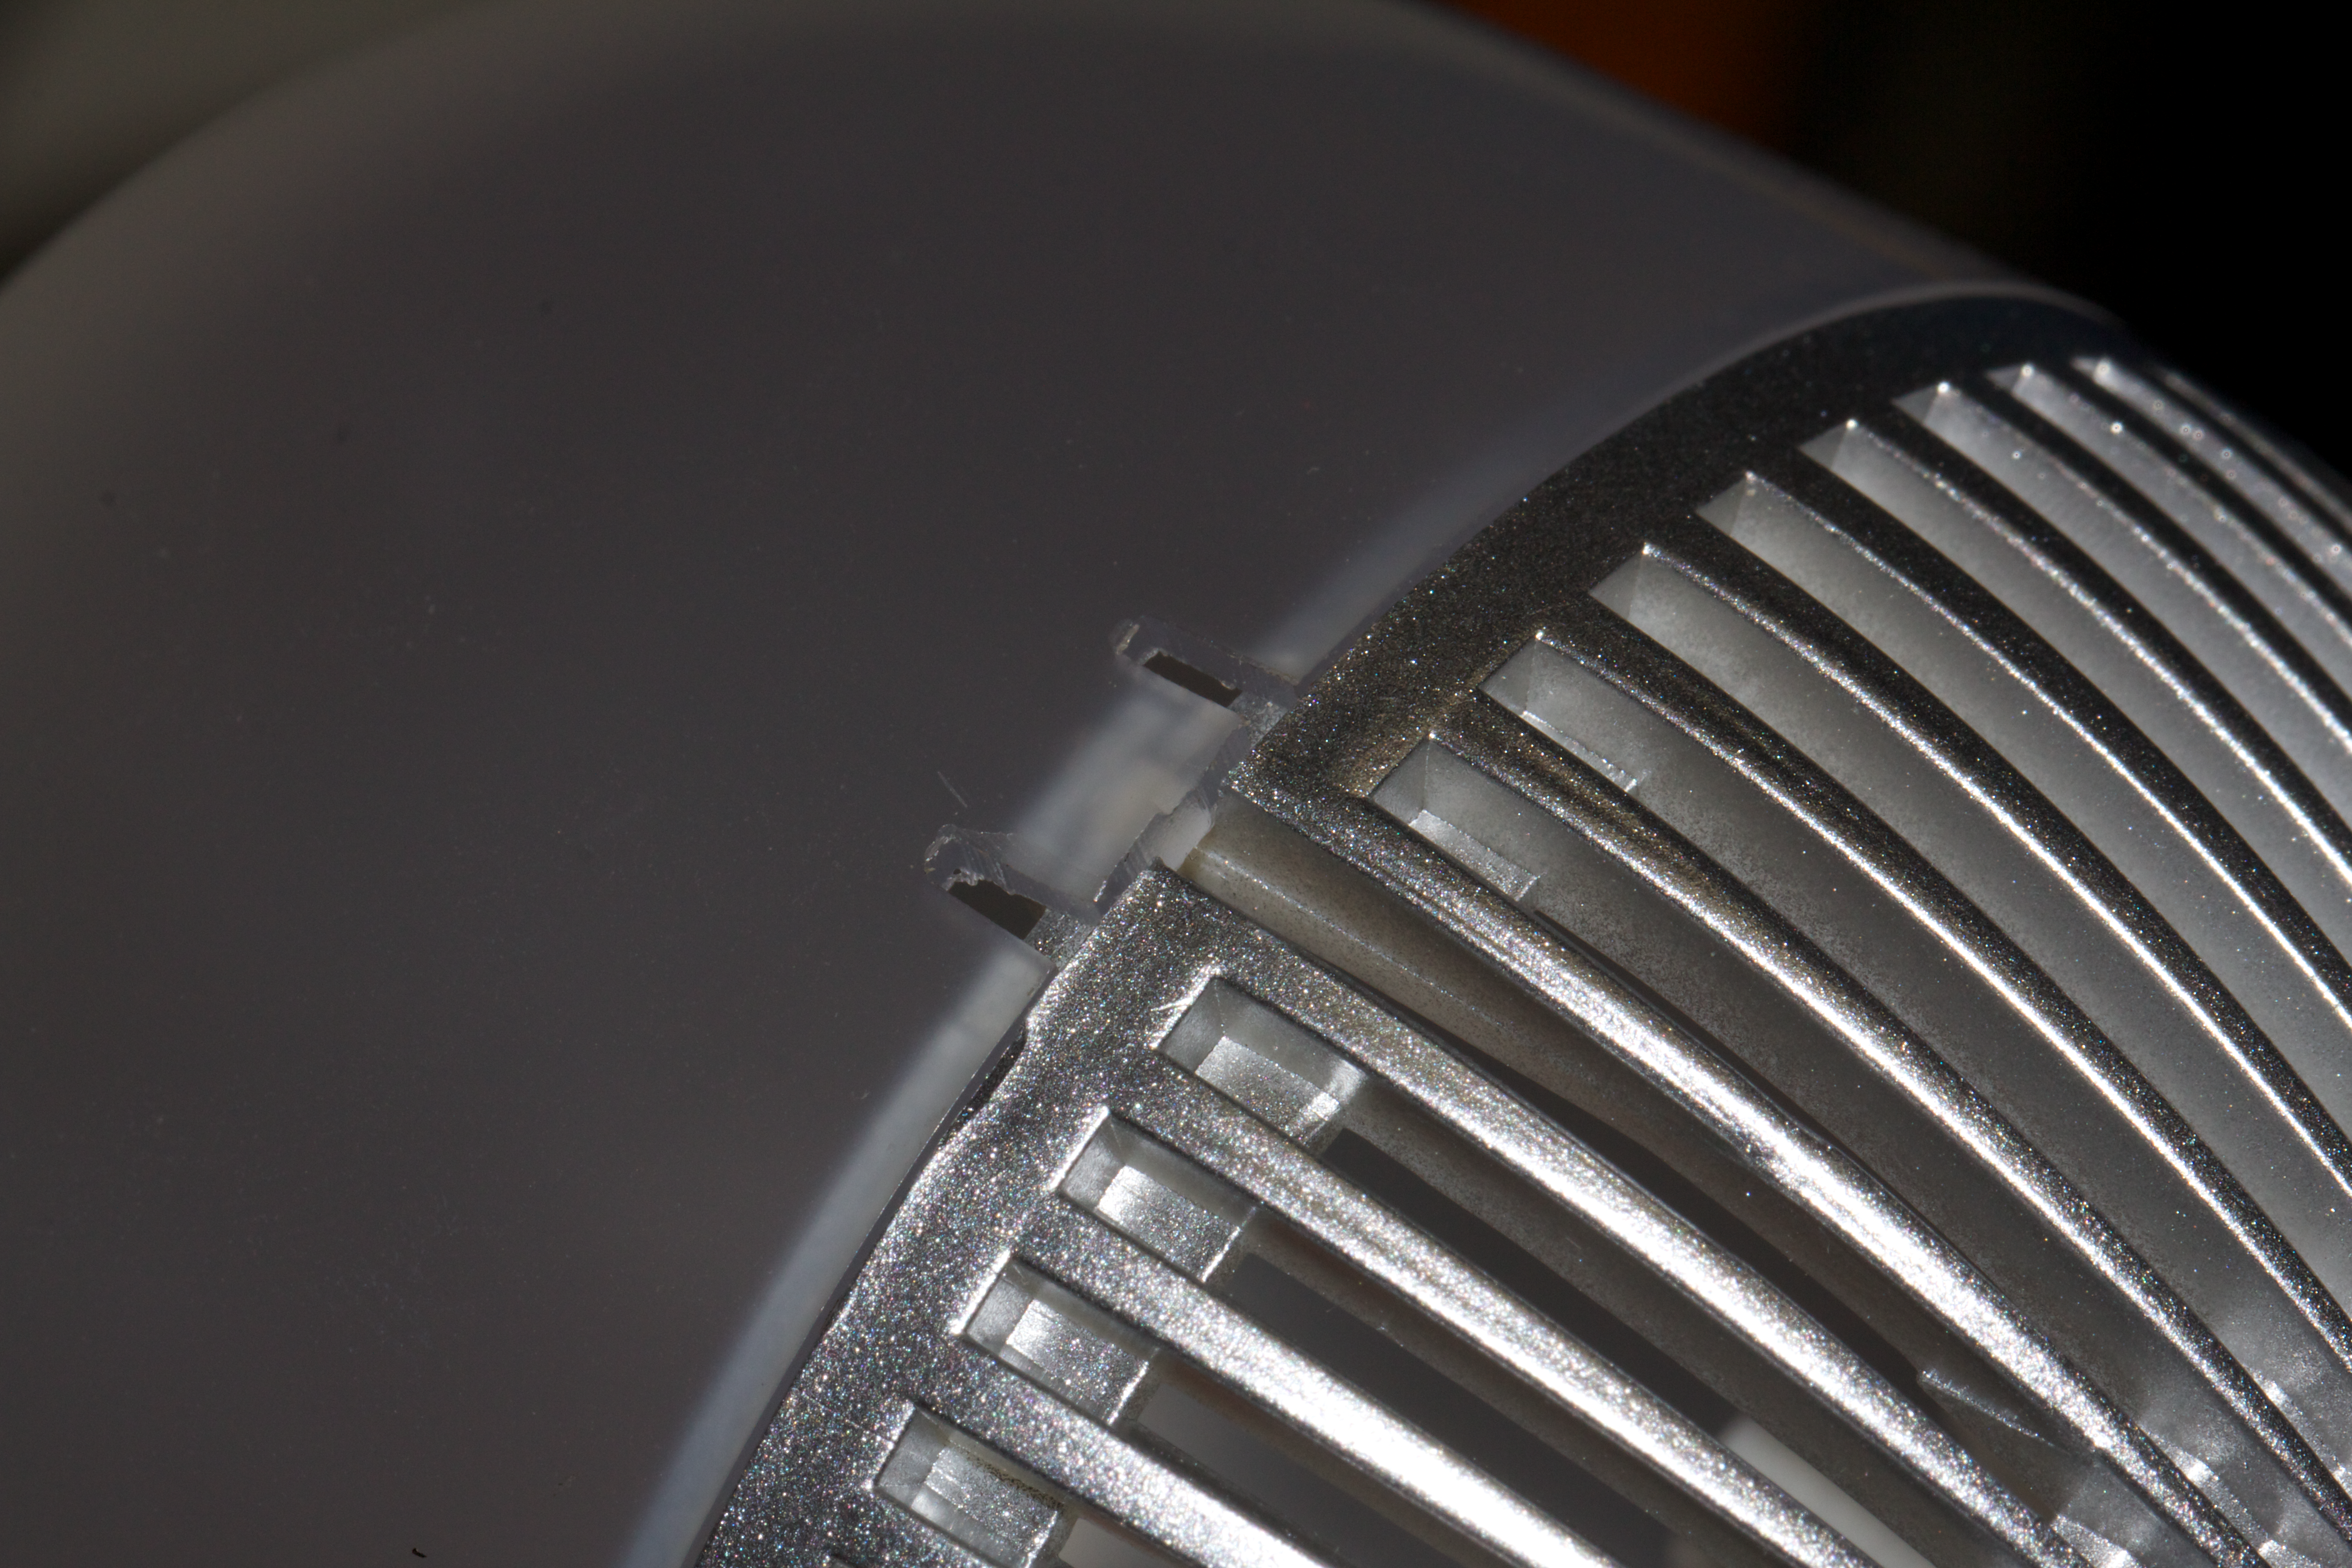
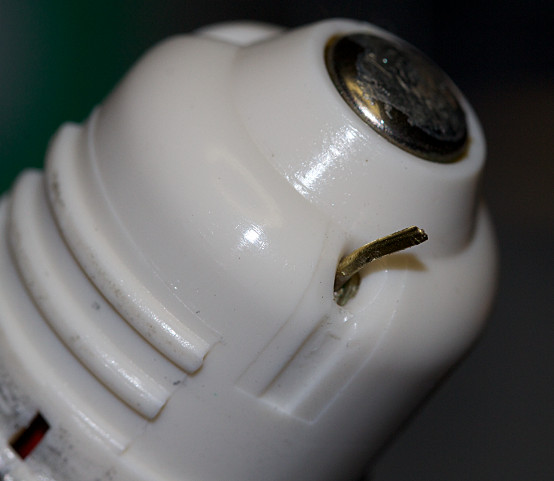
First, remove the plastic diffuser that covers the LEDs. (I recommend doing this if it's going to be put into a fixture that has its own diffuser and is well out of the reach of people.) You can pop it off with a screwdriver, but the plastic tabs on the diffuser may bend and not go back on properly; a more time consuming technique is to apply gentle pressure to the underside of the diffuser's plastic tab while heating it with a hot air rework tool set to about 200C. Remove the heat as soon as the tab bends and continue to apply outward pressure until the tab has cooled in the new position; repeat with the other three tabs, grasp the base in one hand and the diffuser in the other, and pull. You can then use the hot air rework tool to bend the tabs back into their normal position so they will hold the diffuser tightly again when you put it back on the bulb base. (See picture of restored diffuser, or large version of the photo.)
Click for detail.
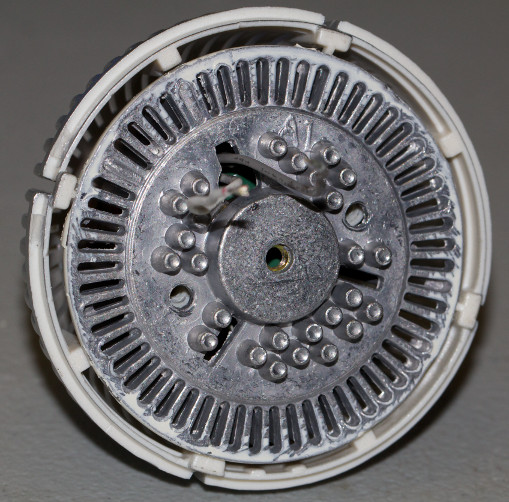
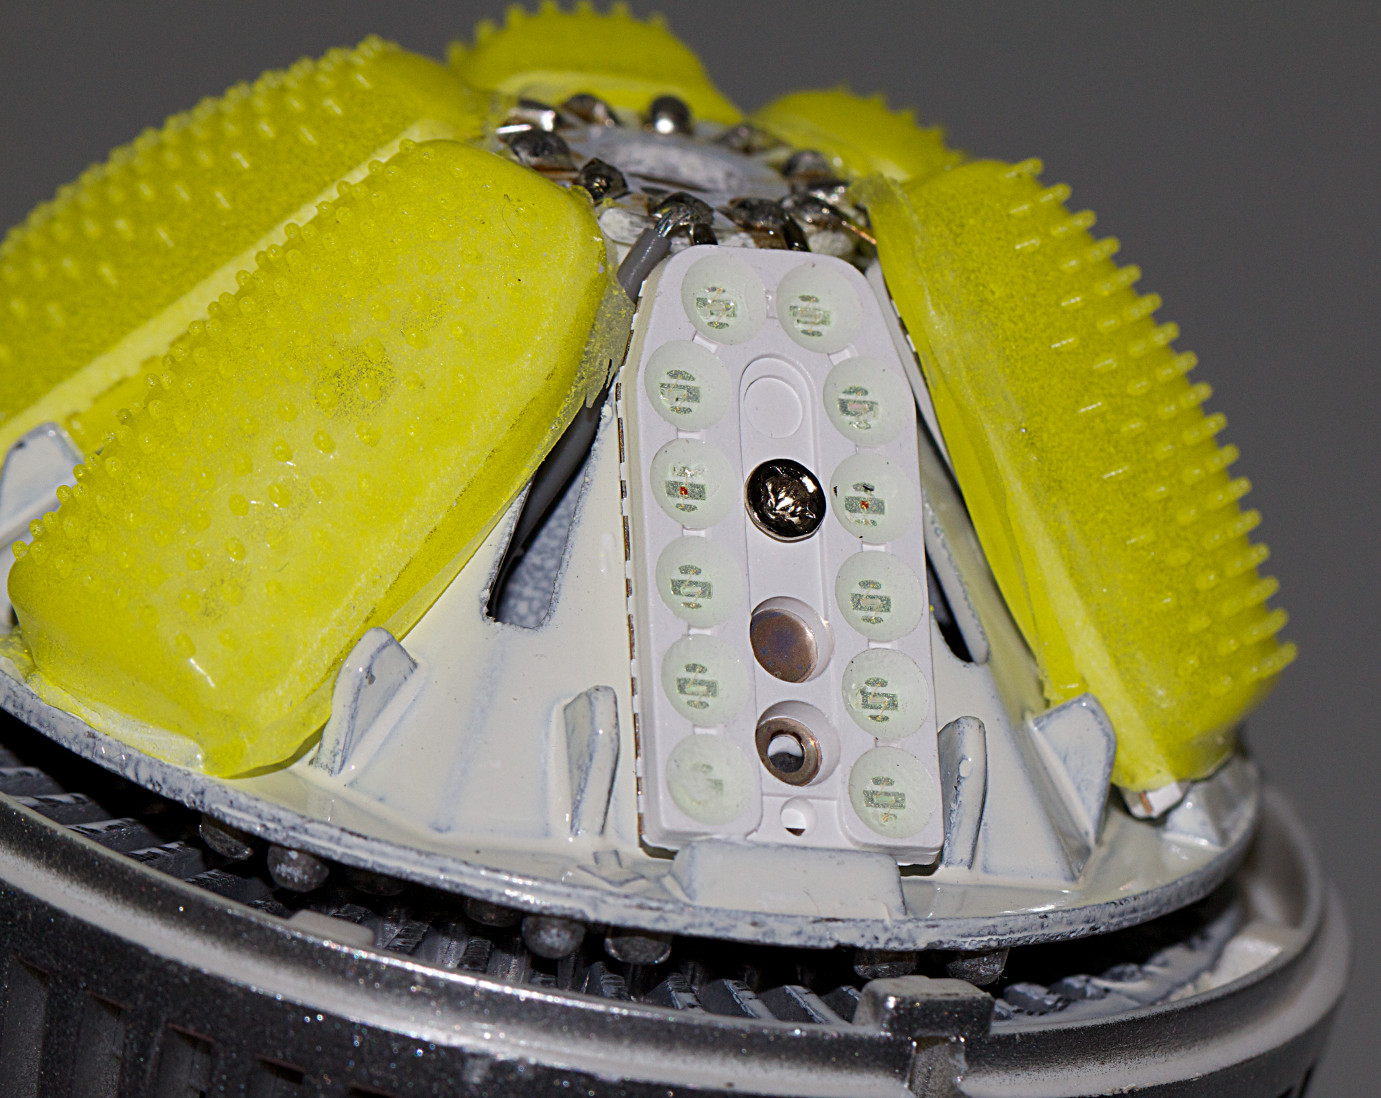
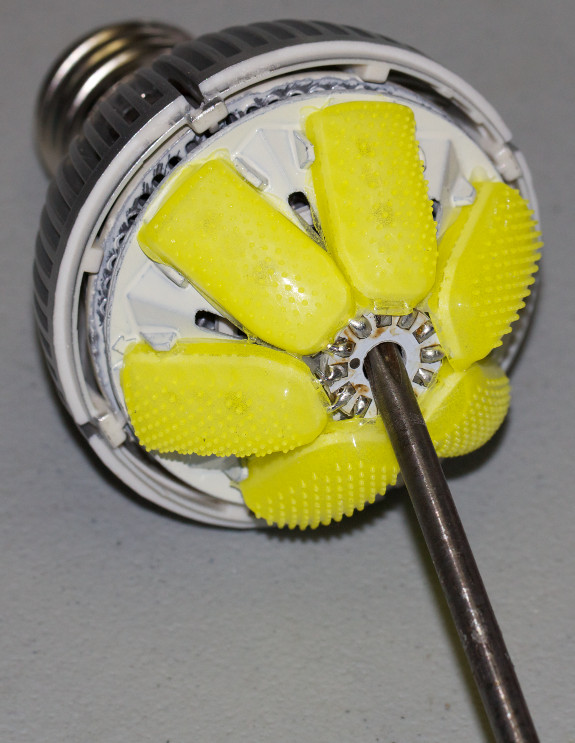
Removing the diffuser reveals six LED chains of 12 diodes each. Two of the diodes on each chain are red, the rest are blue. They are covered by yellow filters which presumably contain a yellow-emitting phosphor. They can easily be removed and replaced with tweezers or forceps. The six LED chains are electrically paralled and driven by about 34V. Note that the silvery part of the bulb's exterior package was just plastic and the real heatsink can now be seen as well.
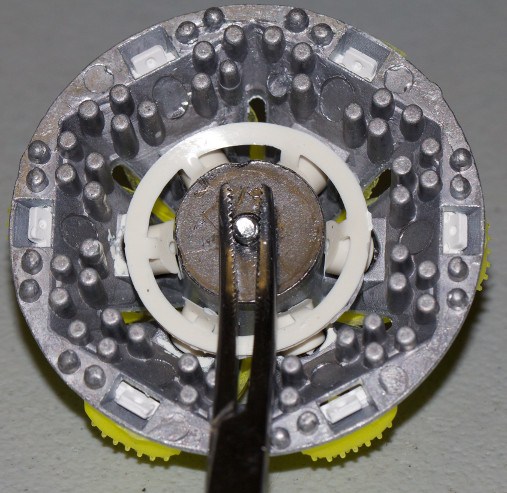
There is a screw in the center of the heatsink holding the LED chains. It's a philips. Undo it, being careful not to let the screw get out of the center hole (I used forceps to keep it in place in the illustration.) Unsolder the grey and white (positive and negative, respectively) wires from the top and gently pull off the LEDs and their heatsink. The metal "bulkhead" now revealed is secured to the plastic base by two triangle-head screws. Undo them (if you don't have triangle bits, you can use a small hexagonal screwdriver carefully instead) and remove the bulkhead to reveal the electronics.
The power supply is wrapped in heat shrink except for one capacitor. If you want to remove it entirely, you will have to uncrimp the Edison screw and unfold the neutral contact wire. Then apply your soldering iron to the hot/line contact in the center of the screw while gently pulling on the power supply. It will come out.
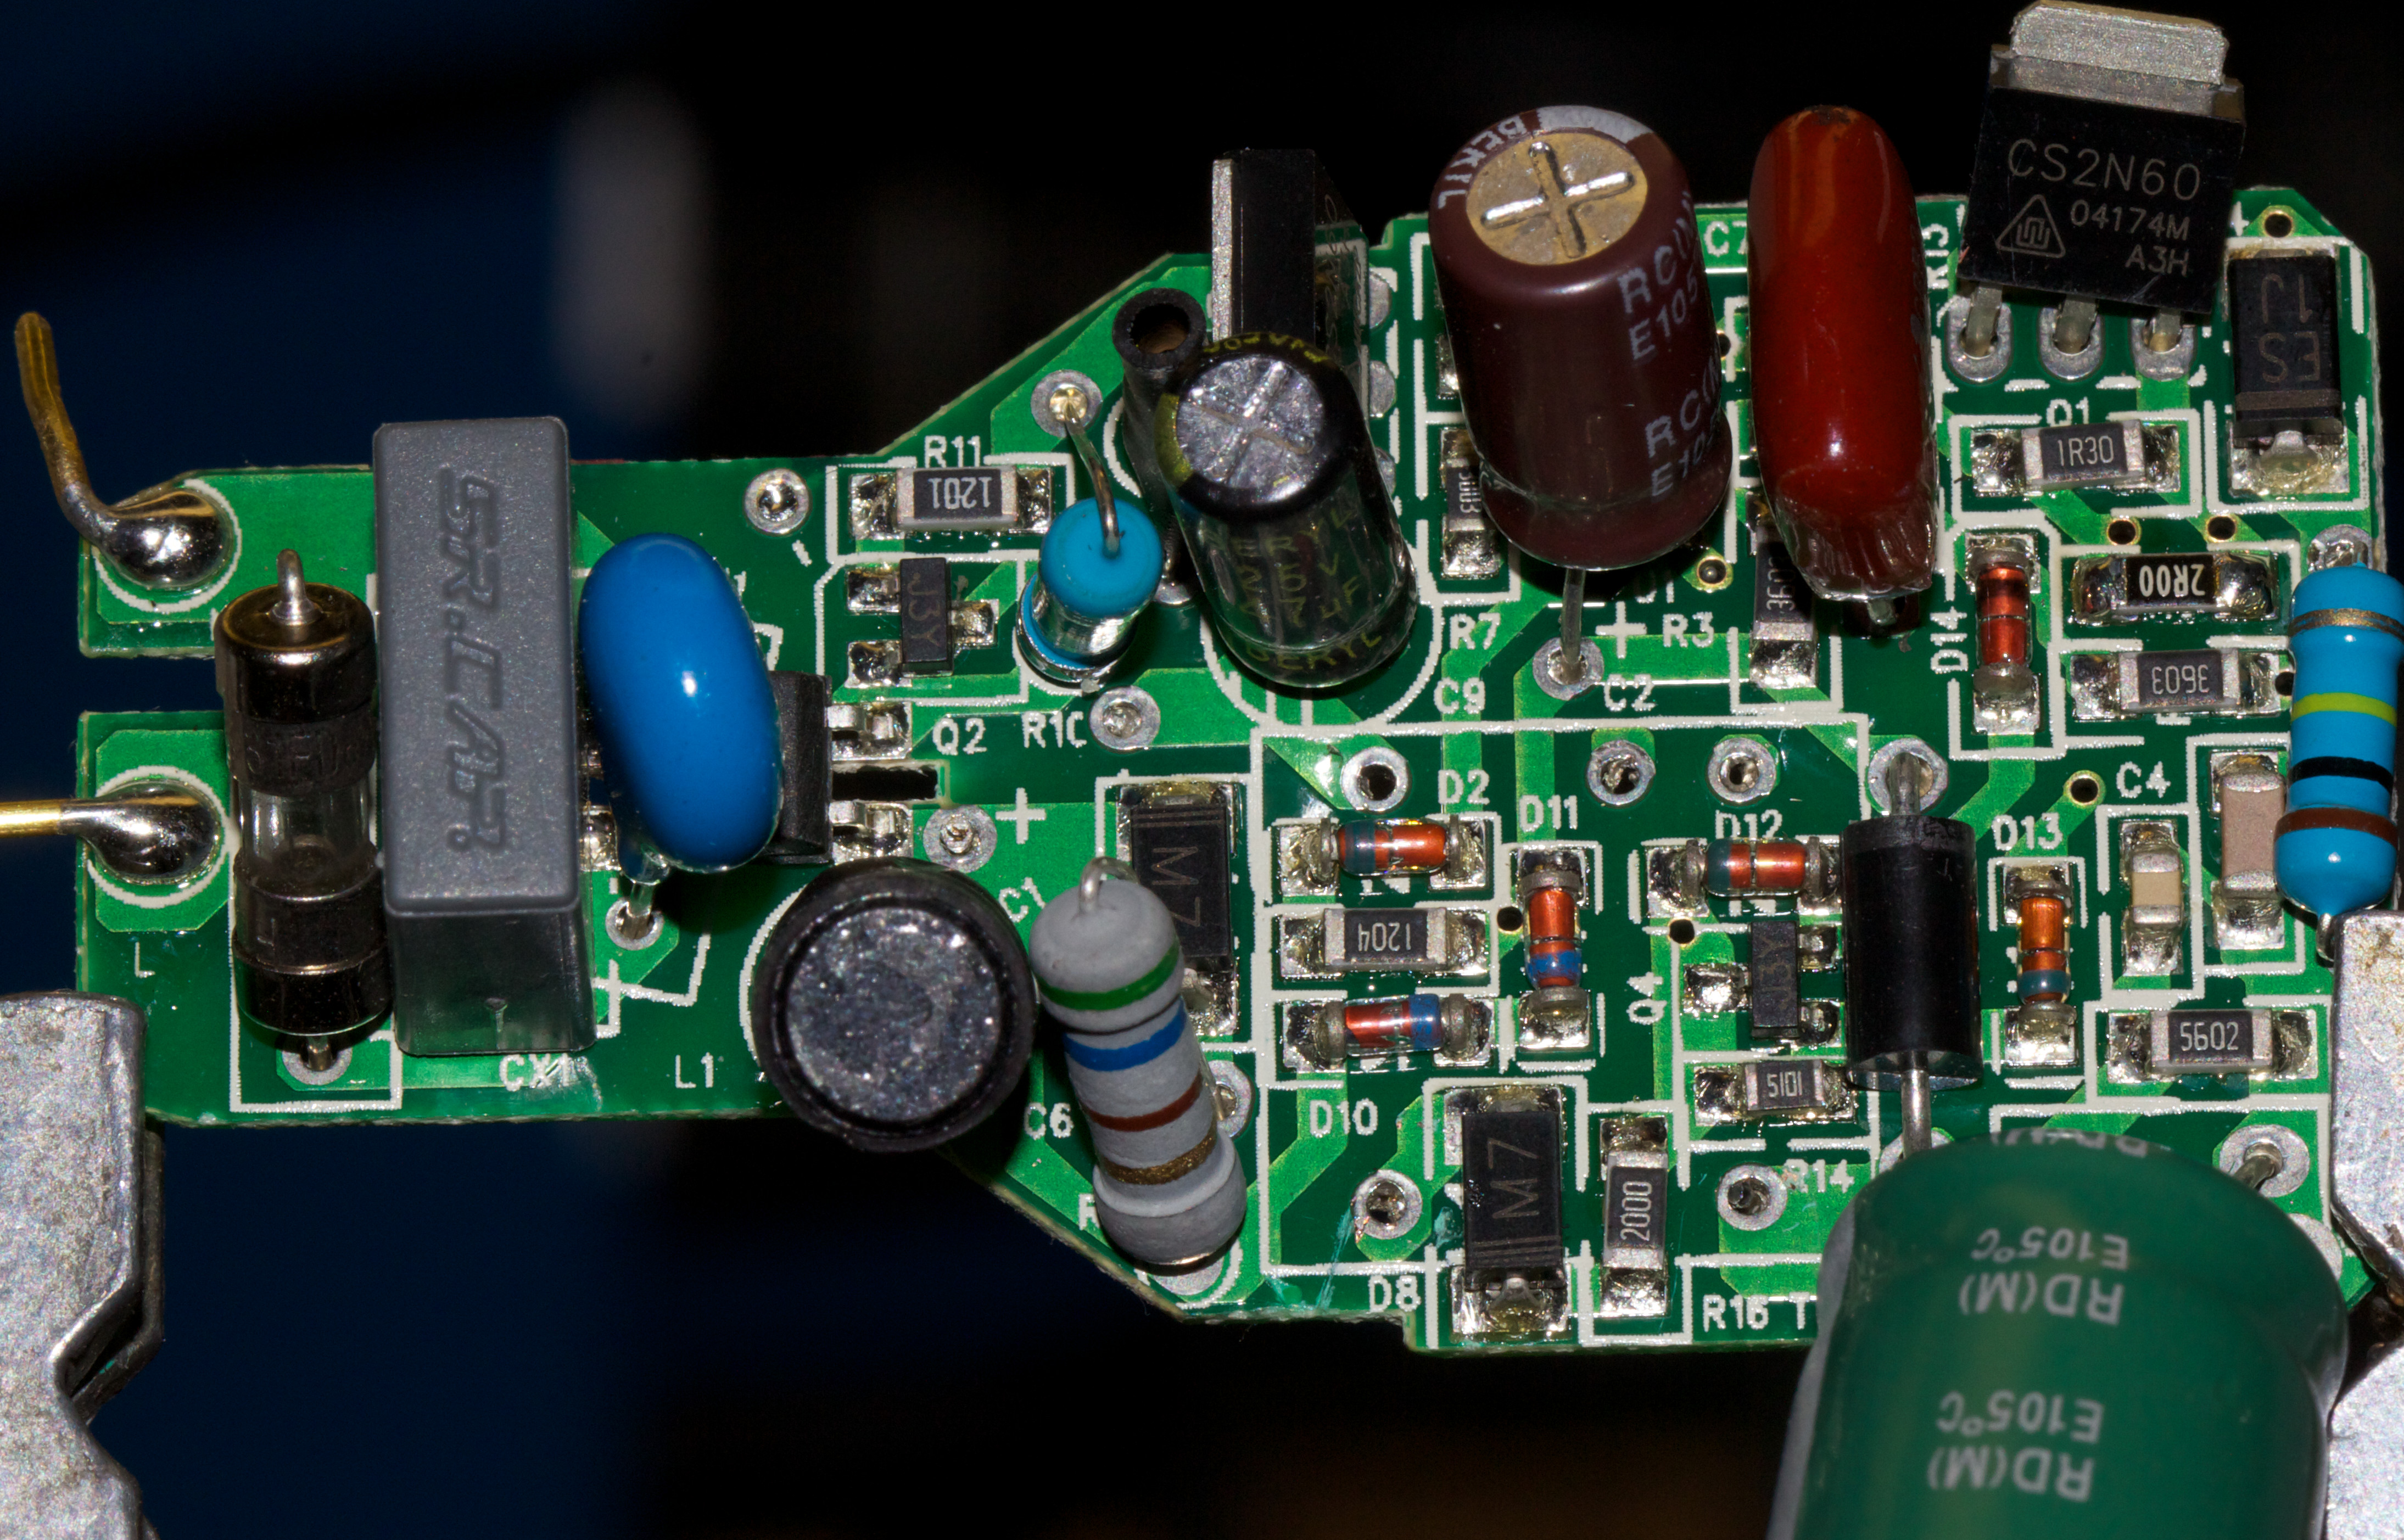
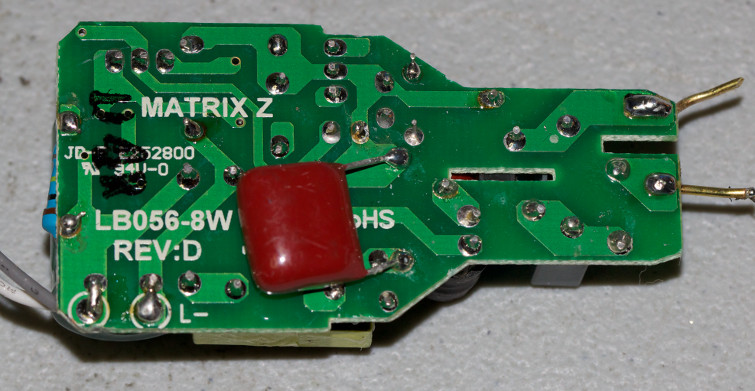
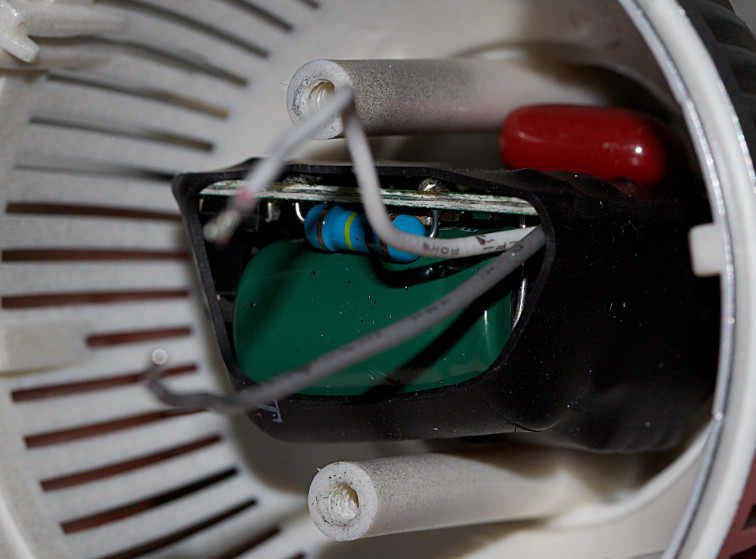
Electronics
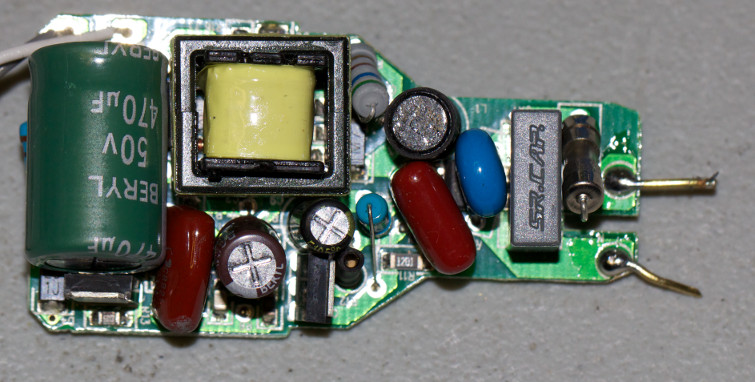
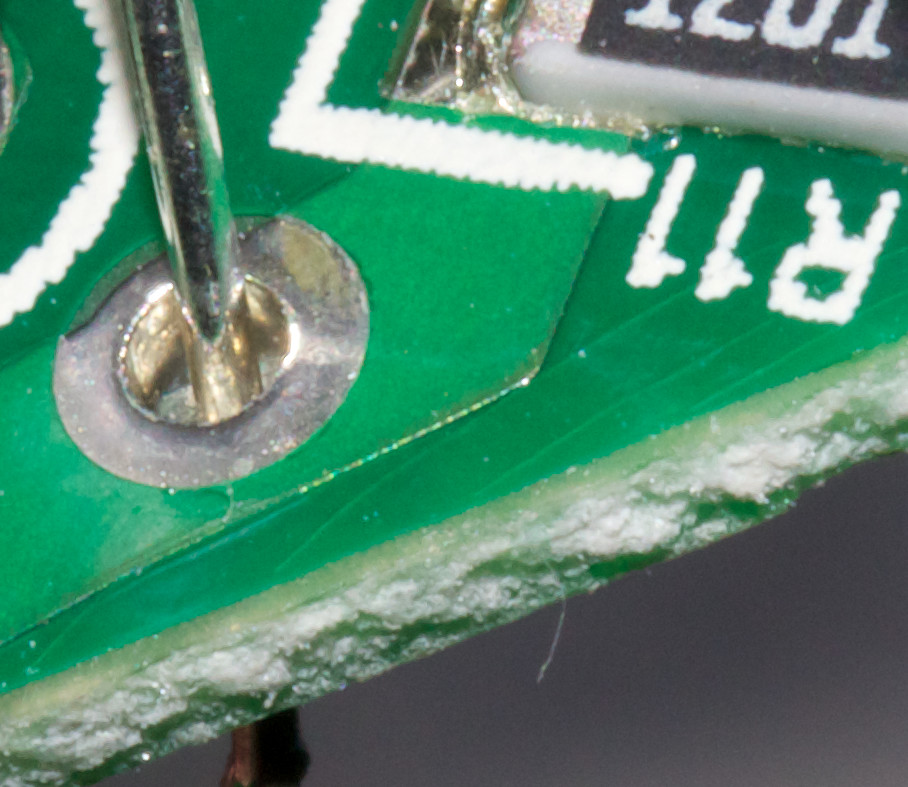
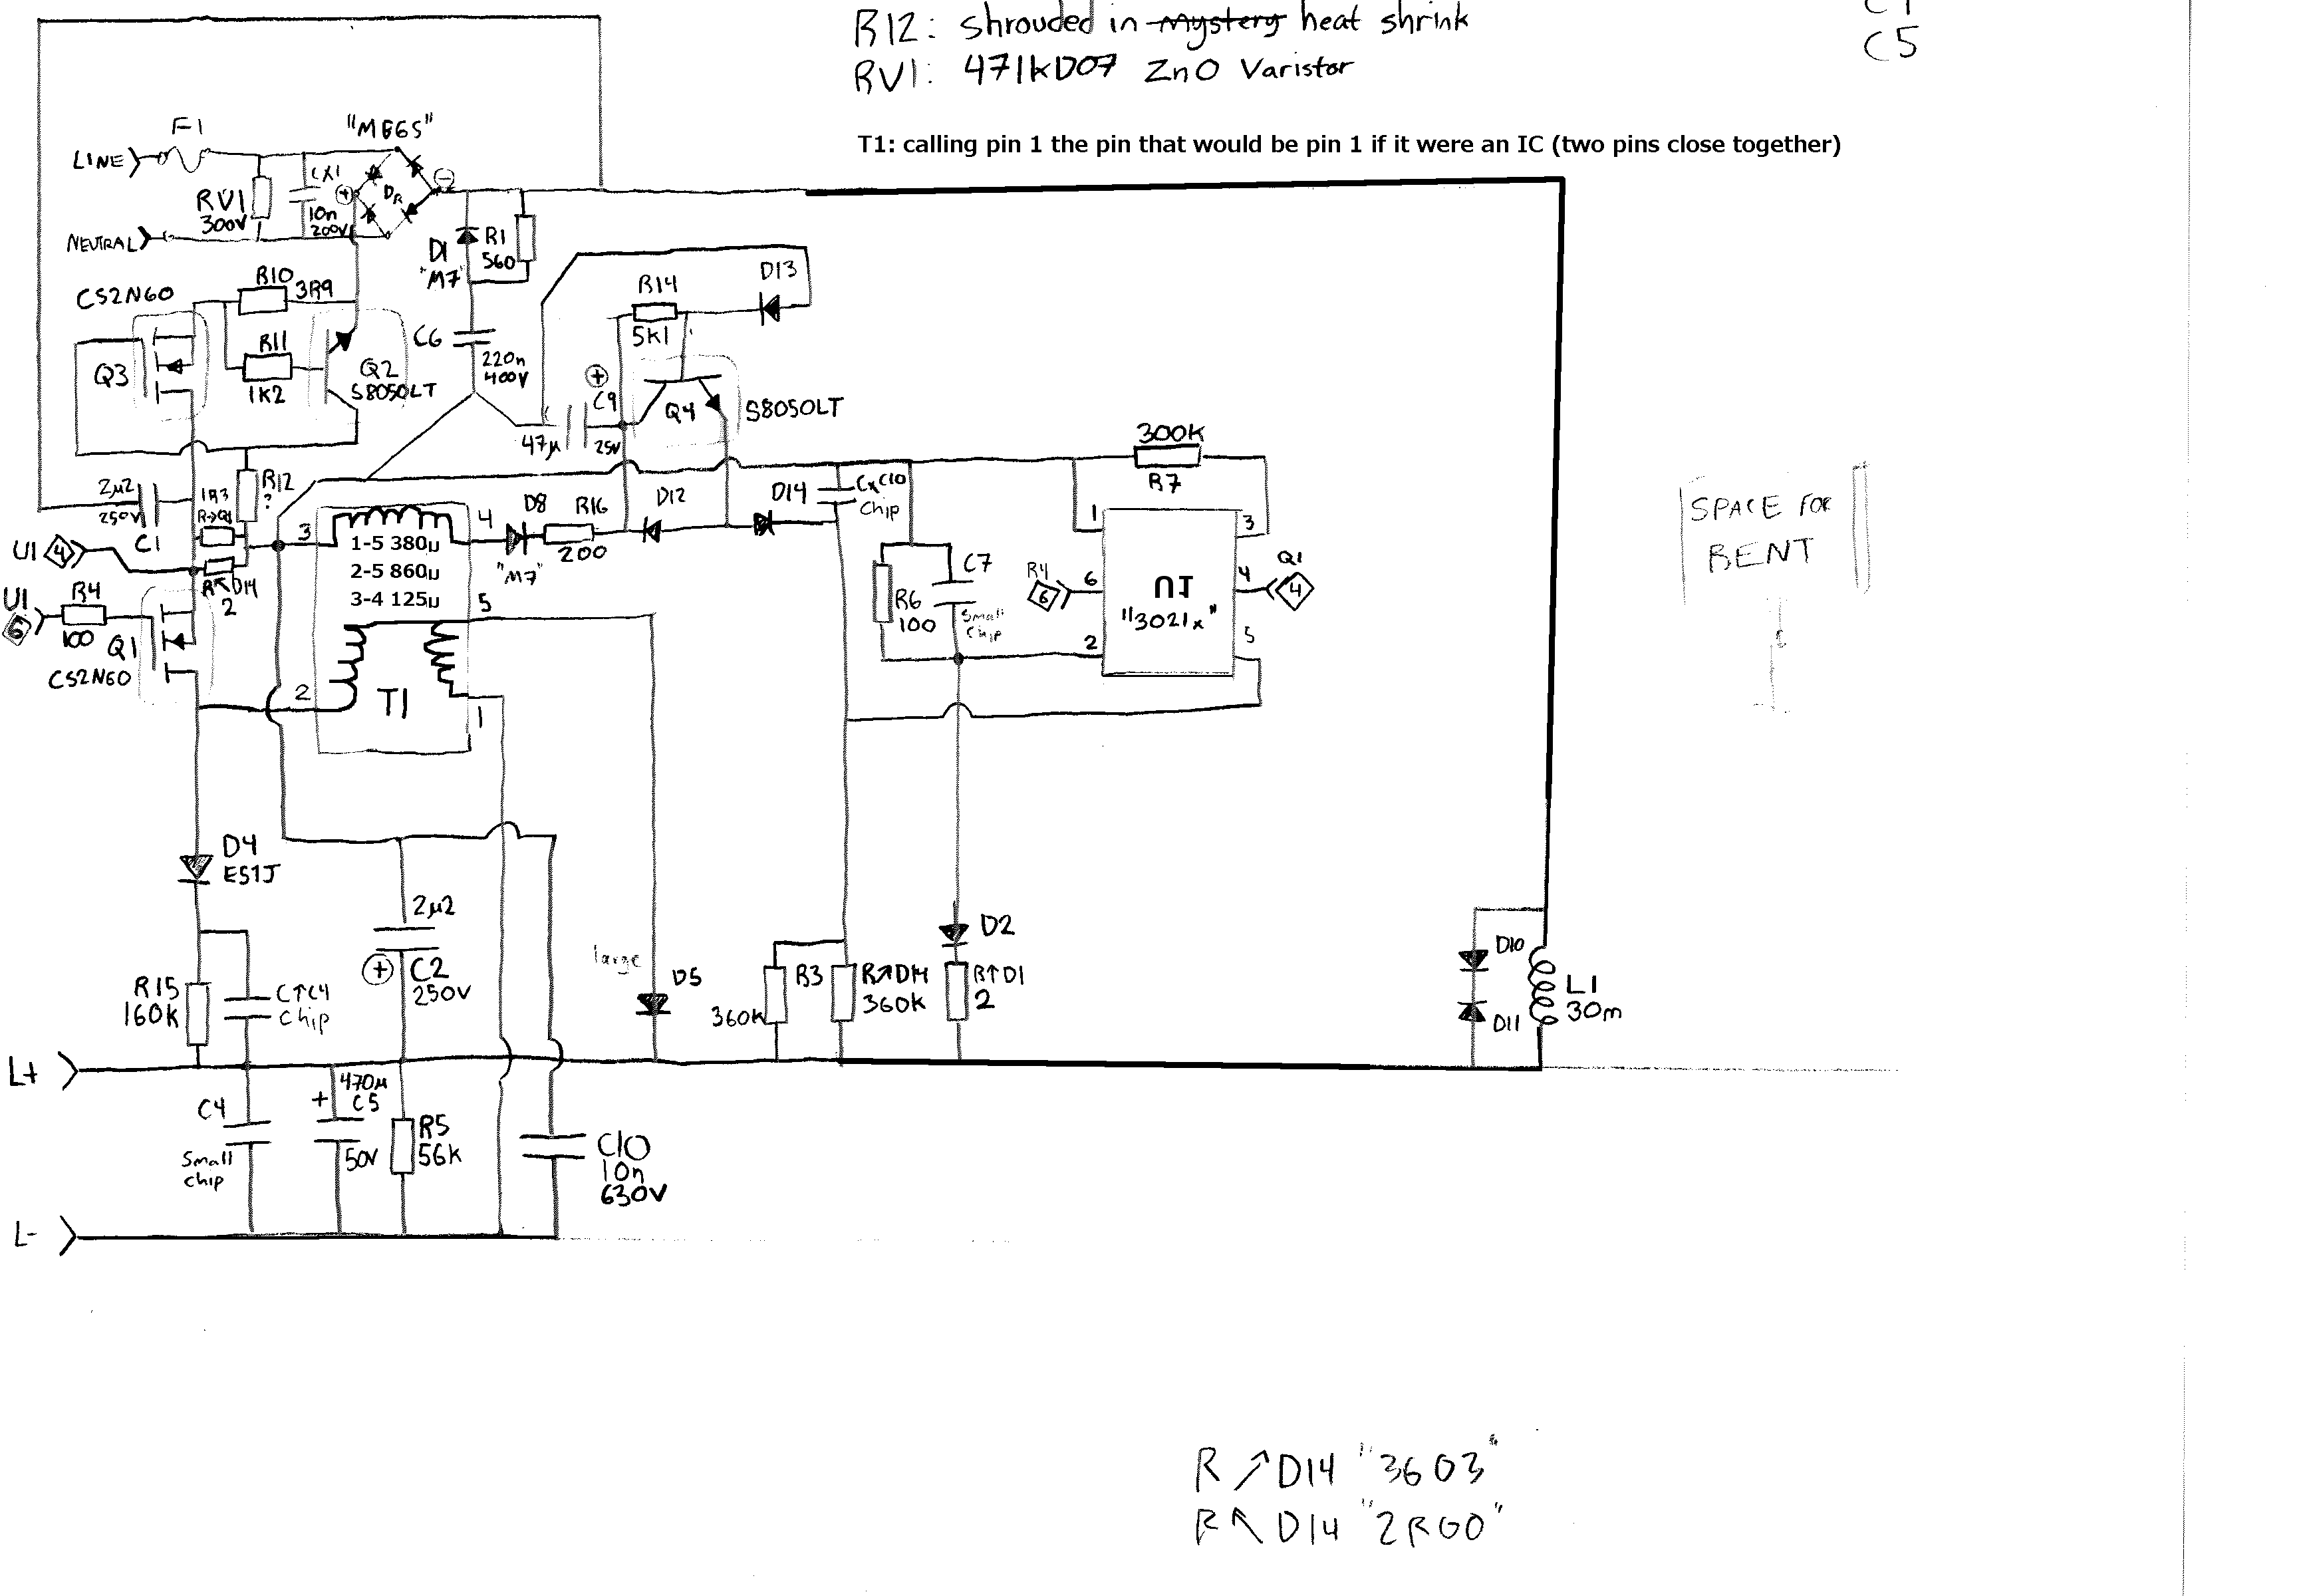
The PCB is double sided and components, through-hole and surface mount alike, are packed closely together, par for the course in electronic lights generally; this board also has silkscreen on both sides, but the components often cover their designations. The soldering is evidently by hand; I noted and fixed one bad joint. Also, many of the holes for the through-hole components are not plated through, so you'll see such components only soldered on one side in some cases. There are components under the transformer and some of the capacitors, so if you want to reverse engineer the circuit, you will have to remove them to look at their connections. I was planning to put up a nice schematic, but was not able to find a Mac schematic capture program that wasn't unpleasant and I am writing this review on my laptop. So here is a hand-drawn schematic. Sorry that things got a bit crowded on the left; paper suffers from a bothersome lack of easy cut-and-paste (I don't actually have any paste.)
The electrolytic capacitors are made by Zhao Qing Beryl, and the big one is from their RD series. While it should be okay for quite a while at the temperatures I measured inside the bulb, it's not really a proper high temperature capacitor, being rated for 105C.
Conclusions
This is a decent bulb for the price, certainly better than many cheap LED bulbs on eBay - it's really not in the same class as the bottom end ones, rather, it's at least comparable to high end LED bulbs. I'm a bit concerned about how long its electronics will last, though, especially if it's left to run for a long time, and its color rendition leaves something to be desired.
Outside of applications where the unique properties of LEDs are important (frequent cycling, instant start, dimming, mechanical durability), I would suggest sticking with CFLs and waiting for LED lighting technology to get better. I have installed these bulbs in my kitchen light, as previously mentioned, and will be watching to see how they do over the next few years.